Campaigns give you the ability to send a bulk email to your users for different purposes to promote items on your store
Introducing Campaigns – the feature that combines the power of email marketing and AXOMO, all based within your store platform. Campaigns can be used for a variety of purposes:
- Collecting pre-orders
- Advertising a discount or promotion
- Promoting new items
- Fundraising
- Clearance sales
And so much more! The following guide will help you learn how to start using the Campaigns tool to gain traction on your store.
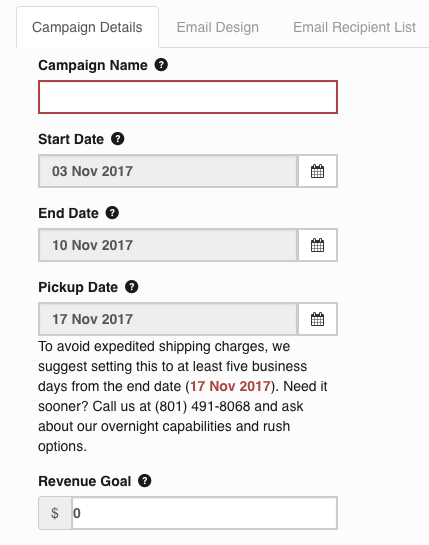
1.) Navigate to “Campaigns” in the left side of the Admin Panel and enter your campaign details

The first step to creating your campaign is giving it a name (for internal use only), setting your start date and end dates, and pickup date – which is the soonest that users can pick up their items.
This is automatically set to at least five business days from the end date to give enough time to have the order ready. You can also enter a revenue goal that you’d like to aim for with your campaign.
Next, you can set up a pickup location and shipping location so our team knows where to send the items and your users know where they can pick them up from once they’ve arrived.
2.) Design the email for your campaign

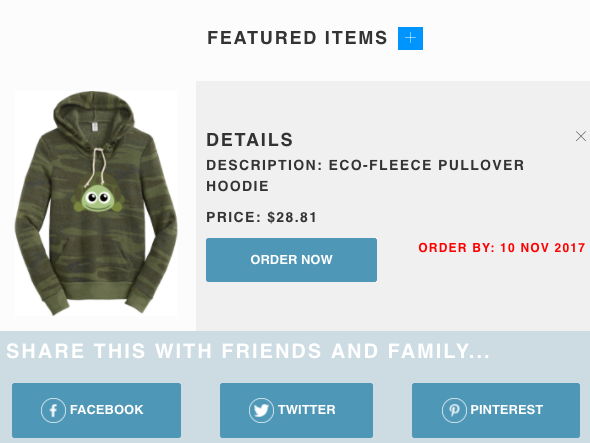
After you’ve entered your campaign details, you can design the email for your campaign. We’ve provided a template that you can customize with the images, items, and messaging that you’d like to share with your users.
This is where you’ll choose the item that you’d like to promote – whether it’s for pre-order, on sale, brand new, or you’d just like to let your users know about it.
Be sure to follow the instructions on the right side of the email design manager so you can create images that are within the correct dimensions for the email.
3.) Enter your email list and set up reminders

The campaigns tool allows you to add emails individually, or upload a CSV (comma-separated) file of the email addresses you’d like to send your campaigns to.
Admin Tip: You can find and export all of your users’ emails at once in the “Users” tab. Once you’re there, you can click “Download CSV” to get a file that you can upload for your campaigns.
Once you’ve chosen the users you’d like to send to, you can set a series of reminders that will notify your users about your campaign in intervals that you choose.
From a “Last Chance” reminder email that sends on the last day of the campaign to “One Week Left”, you can customize these reminders to send whenever you think is best.
4.) Approve and monitor campaign performance

The final step is approving your campaign and then watching the orders come in!
The Campaign Progress tab will show a status bar of how many days are left in your campaign, how many items were ordered as a result, the cost to produce those items, and the total profit made.
You’ll want to keep a close watch on this tab so you can adjust your reminders based on your campaign’s performance. Ultimately, campaigns are a great way to raise awareness for your store and keep users engaged with your brand.


